Showing posts with label paint. Show all posts

Tuesday, November 26, 2013

Painted Glass Serving Trays


This project created a couple of different serving trays that we were able to combine and rearrange to make various styles of trays.  We bought a couple of clear glass serving trays at a thrift shop, along with some decorative beaded edging and a few glass candlestick holders.  We also stuck with our decorating theme for this Thanksgiving by using gold and copper metallic spray paint and extra fine glitter, spray adhesive and clear acrylic spray paint, and a hot glue gun.


First, we sprayed the bottom of the glass trays and the candlestick holders with either gold or copper metallic spray paint.  We did not spray the top of the trays because we didn't want the paint to chip and get into any of the food we will be serving.  Plus, the ridges and designs on the bottom of the glass plates made a really amazing looking tray when viewed through the unpainted top side of the trays!

Next, we sprayed the candlestick holders with spray adhesive and coated them with either gold or copper colored extra fine glitter.  We then applied a couple of coats of clear acrylic spray paint over the glitter so that it wouldn't fall off all over the place.  Nobody wants glitter covered food for Thanksgiving!

Now we mixed and matched our different trays so that some of the trays would be tiered.  To add a little security to the elevated trays, we used a hot glue gun to adhere the candlestick holders to the bottom of the trays.  We also used the hot glue gun to apply the beaded trim to the bottom of one of the trays.  After wiping down and cleaning the trays we are ready to serve up some yummy Thanksgiving snacks on our new decorative serving trays!



Sunday, November 24, 2013

All that Glitters is Gold...Candles!

We are getting into the Thanksgiving decorating spirit (and not jumping right to Christmas...hate that!).  Our first project was really simple and easy: make plain candles prettier!  We used plain stick candles, metallic spray paint, spray adhesive, extra fine glitter, clear gloss acrylic spray paint and a wire hanger.


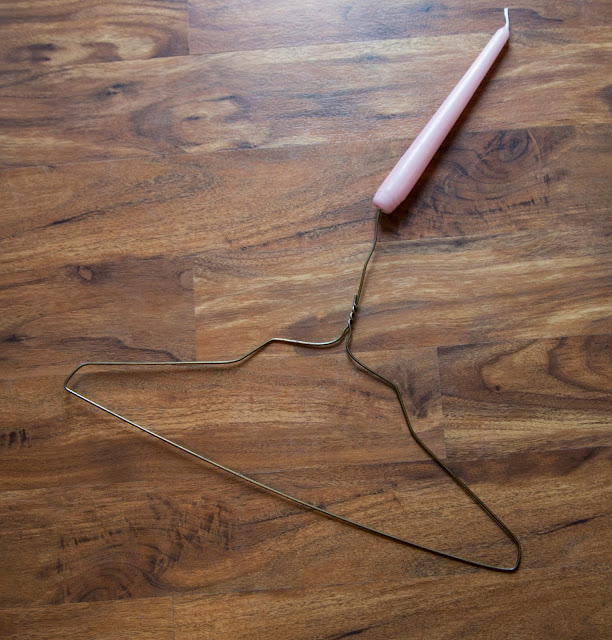
Since we wanted the candles to be evenly coated, we first straighten the hook of the wire hanger and then jammed it into the bottom of the candle.  Make sure you apply a good amount of pressure but don't try to get crazy because you don't want to bust up the base of your candle.  Now you can hang or hold your candle so that you won't have to set it down and only work on one side at a time.


The rest is pretty simple.  First spray the entire candle with the metallic spray paint by following the directions on the spray paint can.  You may even want to give it two coats.  After it is dry, spray the candle with the spray adhesive, once again following the directions on the can.  Sprinkle the extra fine glitter over the adhesive and allow that to set until completely dry.  Finally, spray the entire candle with the clear acrylic.  You may want to apply a few coats of the spray acrylic so that the glitter is really covered well and won't fall off every time you move it.  

We made these candles to use as a decoration and we have no intention of burning them.  Typically, you shouldn't burn things that have been covered in paint, glue, and glitter, so we don't recommend doing this project on candles you are going to burn unless you are working with products that are meant to be set on fire.